 English USD
StarSeek 5 Frequently Asked Questions (FAQ)
- Do I need an internet connection to use StarSeek, or to control a GoTo telescope with it?
No. However, to control a GoTo telescope you will need the StarSeek Wireless Telescope Controller, which is sold separately. - I purchased StarSeek version 4. Can I get a free upgrade to version 5?
Unfortunately not. StarSeek 5 is a significant rewrite of the app, requires a later operating system (iOS 8 or later), and it's distributed as an entirely separate app on the App Store. Apple will not credit the cost of one app toward the purchase of another; this is Apple's policy, not ours. - I already have StarSeek 4 on my iPhone. If I don't want to buy StarSeek 5, will I still be able to use StarSeek 4?
Yes, you can use StarSeek 4.x versions indefinitely. It's just that there will be no further free updates for version 4.x. - I purchased StarSeek, but I lost my iPhone/iPad/iPod Touch (or I bought a new one). Do I have to buy the app again?
No. Just download it again from the App Store. Even if you "purchase" it again, you won't be charged. The App Store folks are very careful to make sure you won't pay for the same purchase twice. - I purchased StarSeek, but it doesn't work on my iPhone/iPad/iPod Touch. Can I get a refund?
Make sure you are running iOS version 8.0 or higher. StarSeek 5 won't work on any older version. You can update to the latest iOS from Apple, free of charge, using iTunes. Some older devices will not accept iOS version 8 or later versions. If you have one of those devices, you will not be able to use StarSeek 5, unfortunately.It may be possible to get a refund for your purchase, but not from us, since the apps are sold through the App Store. Instead, you should contact Apple about this.
- I purchased your app, but I get a message saying it's too big to download. How do I get it onto my iPhone?
AT&T restricts you from downloading any apps larger than 10 MB over their network. To get around this, join a WiFi network from your iPhone, then download the app over the WiFi. Or, download the app to your computer with iTunes, then sync it to your phone.Apple's iPhone Support site has information on how to do all of this, and more.
- I have a BlackBerry/Android/Windows Mobile/other mobile device. Do you have a version of the Orion StarSeek app for my device?
We do have a version of StarSeek for Android devices. Click the StarSeek 4 for Android tab on the StarSeek web page for information. - Will the Orion StarSeek apps work on the iPad?
Yes! StarSeek is a "universal" app that supports the iPad screen at full resolution, as well as the smaller iPhone/iPod Touch screens. It works almost identically on all these devices. In a few places, the user interface has been rearranged to fit the larger iPad screen, but the app's features and functionality remain unchanged. - I'm running your app, but all I see is stars! How do I get to the Settings and other controls?
Rotate the iPhone to "portrait" (vertical) orientation - the toolbar and other controls will appear. We designed the app this way so the star chart can be shown in full-screen when the iPhone is held in "landscape" mode. If you don't like this, go to the app's Settings > Appearance screen, and turn on the Toolbar in Landscape switch (under the Auto-Rotation section). - I thought the Orion StarSeek app would show me a map of the sky anywhere my iPhone is pointing. But it doesn't! What's wrong?
If you have StarSeek 5 and iOS 8 or 9, make sure the following iOS System setting is turned on:Settings > Privacy > Location Services > System Services > Compass Calibration
Finally, a word of caution: the solid-state compass built into the iPhone/iPad is notoriously inaccurate, and easily affected by interference. It can easily be wrong by ten degrees or more. The compass may be useful for locating bright objects in a general part of the sky, but it's certainly not accurate enough to point a telescope.
- All that pinching to zoom in and out is a pain! Is there a better way to zoom in on all those tiny little objects?
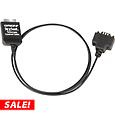
Yes! The app has "hot corners" for zooming in the lower left and right corners of the screen. These are shown by + and - symbols whenever you swipe or pinch the star chart. Touch + to increase magnification; touch - to decrease it. The zooming will continue as long as you leave your finger down in the desired "hot corner". - I want to control my IntelliScope Dob with the StarSeek app and either the StarSeek WiFi module or StarSeek Telescope Control Cable. But I can't figure out the cabling needed. What am I missing?
Most likely, you're missing the #5222 Orion IntelliScope to PC RS-232 Connector Cable. This cable, which is sold separately, is needed to connect either of the above hardware solutions to the IntelliScope hand controller. - Why can't I get StarSeek to properly control my IntelliScope Dob using the WiFi module or the StarSeek Telescope Control Cable? The telescope cursor on the StarSeek chart either doesn't move at all or moves only after a delay of many seconds after I've moved the telescope.
After you do the two-star alignment of the telescope using the IntelliScope hand controller, make sure you press the FCN key. Now the telescope cursor on the StarSeek app should move immediately and smoothly in response to manual movement of the telescope.Be aware that the IntelliScope controller is programmed to shut off after being idle for 50 minutes, to preserve battery life. So when using an iOS device as your "controller," be sure to press the FCN button on the IntelliScope before 50 minutes has elapsed to extend the ON time for another 50 minutes. If the controller does turn off, you will need to repeat the initial alignment procedure.
- I need some help in understanding the features and functionality of the StarSeek app. Is there a manual?
We don't have a printed manual available, but the app contains an extensive and well-organized Help section, where you're likely to find answers to most of your questions. Tap on the Help link at the bottom right corner of the screen. The informative "Basic Concepts" articles also reside in the Help section. - I haven't used the Orion StarSeek app in a while. Now, when it starts up, I only see an empty black (or green) screen. What's going on?
The last time you used the app, you were probably zoomed in on a very small field of view, and the thing you were looking at is no longer there. (Were you looking at Jupiter's moons?) Try zooming out by placing your finger on the "-" sign in the lower left corner of the screen.If the entire field of view is green, you are probably looking below the horizon. If the Use Accelerometer setting is turned on, then you'll always be looking below the horizon if you're looking down at the phone. Turn off this setting, or hold the phone above you.
Zooming out should make this clearer. You can also try making the horizon translucent to view the stars underneath it; go to Settings > Sky & Horizon to do this.
- Your app used to work fine, but now it crashes every time it starts up. How do I fix this?
Did you recently update the operating system software on your iPhone/iPad/iPod touch? Sometimes, these devices just act strangely. Try rebooting it. If all else fails, completely delete the app from your device, and reinstall it from the iTunes Store. You won't be charged for purchasing the app a second time, as long as you do it from the same iTunes account that you used to purchase it originally. - I want to put "Telrad Circles" on my sky chart, which simulate the field of view of my telescope/Telrad/finder/binoculars to assist in star-hopping. How do I do this?
Go to the main Settings icon > Telescope Display section, and turn on the Telrad Circles option. If you're connected to a telescope, the Telrad circles will appear on the sky chart where your telescope is pointing. If you're not connected, turn on the Show Even if Not Connected to Telescope option. Then the Telrad circles will always appear centered in the middle of your sky chart. - I have a Bluetooth serial adapter. Can your apps use Bluetooth to control my telescope?
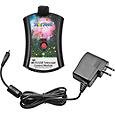
Unfortunately, no. The iPhone OS does not allow third-party applications to have unrestricted access to the Bluetooth capabilities built into the iPhone, iPad, and iPod touch. That is what we would need in order to make this work, and not having it is a major reason we carry the StarSeek WiFi wireless telescope control module.Unrestricted Bluetooth access may be possible with a jailbroken phone. But we can't support that, so currently our apps do not use Bluetooth at all. If unrestricted Bluetooth access is allowed in future versions of the iOS, this may change.
- I'm searching for Comet X or Asteroid Y, but it's not in your database. How can I find it?
Recently-discovered comets and asteroids may not be present in StarSeek's original database. To add them, go to the app's Settings > Solar System view, then tap the Update Orbit Data button at the bottom. This will import the latest asteroid/comet data from the Minor Planet Center. If you still can't find your asteroid or comet, the MPC may not yet have added it to its export files. Try again in a few days. - StarSeek is predicting a rise/set time for the Sun/Moon/some other object which is clearly wrong. Is your app broken?
No. The problem is almost certainly that your location, time zone, or the date/time are set incorrectly. Go to StarSeek's Settings view to adjust them.If your device's Location Services are turned off, StarSeek may be unable to determine your current location. A common symptom of this problem is that your latitude, longitude, and time zone will all be zero. To correct this, go into your iPhone's Settings > General > Location Services screen; make sure Location Services are turned ON, and also turned ON for StarSeek.
If rise/set times are off by exactly one hour, the problem is almost certainly that your time zone is incorrect, or that StarSeek thinks daylight savings time is in effect when it really isn't (or vice versa). Governments frequently change the rules for Daylight Savings Time, and while we try to keep up with them, we may have missed something. You can manually set your time zone, and turn StarSeek 's automatic daylight savings time correction ON or OFF, in StarSeek 's Settings > Date & Time view.
- I'm trying to observe a satellite, or the International Space Station. But StarSeek's predictions for where the satellite is/when it passes overhead are wildly wrong. What's the problem?
Your satellite orbital elements are probably out of date. To update them, go to the app's Settings > Solar System view, then tap the Update Orbit Data button at the bottom. This will import the latest satellite data from the CelesTrak. Satellite orbits change rapidly due to atmospheric drag, and due to perturbations from the Earth's non-spherical gravity field, so it's important to update your orbit data frequently — at least once a week — to get accurate predictions for them.You also might want to make sure that your location, time zone, date/time, etc. are correct — if you've accidentally set your observing location to California, but you're really in Colorado, that will make a big difference!
- Can StarSeek align my telescope for me? Can it use the iPhone's GPS to tell me where the scope is pointing?
No. GPS can tell you very accurately where on planet Earth you and your telescope are located. But it can't "auto-magically" tell you what direction your scope happens to be looking toward. Similarly, your iPhone has no way of knowing the orientation that you may have chosen when you plopped your telescope mount down on the ground. Our app has to rely on the coordinates reported by the telescope mount controller. And for those coordinates to be meaningful, you need to star-align your telescope mount before connecting to it with StarSeek.Every telescope mount has a different star-alignment procedure, so for details consult your telescope manual. But the basic idea is this: manually point your telescope at one known bright star, then tell the telescope mount controller that you are aligned on that star. Repeat the process with a second known bright star. Now the mount can compute its orientation relative to the celestial coordinate system, and the mount controller can tell StarSeek exactly where the telescope is pointing, to a very high level of accuracy. The more carefully you've aligned your scope, the more accurate your GoTo object location will be.
Admittedly, star alignment is one of the trickiest problems encountered by new telescope users. StarSeek can help you with this, by using your iPhone's compass and altimeter to help you find bright alignment stars in the sky. You'll still have to point your telescope at them, following the alignment procedure specific to your particular telescope controller. In the end, though, there's no substitute for knowing your way around the sky — and for knowing how to use your telescope equipment properly. StarSeek can help you with the former, but is not a replacement for the latter — at least not yet!
- Observing lists are cool, but creating them by hand is tedious. Can StarSeek import an observing list that I create as a text file, or an observing list from another program?
StarSeek does not support other programs' observing list formats directly. But StarSeek 4 has code to import observing lists as text files. At least a few other programs (AstroPlanner, Deep-Sky Planner, Eye & Telescope) can now export observing lists to StarSeek in this format.See the section on Observing Lists in StarSeek's built-in Help file for instructions on how to import them into the program. Briefly: you can use iTunes file sharing to get them into or out of the program. You can also email observing lists to yourself, and open the .skylist file attachment from your iPhone. Or you can use the Safari browser on your iPhone to download and open them directly from various web sites.
If you want to convert your own observing lists to a text file that StarSeek can import, here's an example of the format that you need to use:
StarSeekObservingListVersion=3.0
SkyObject=BeginObjectObjectID=4,0,701
CatalogNumber=M 42
CatalogNumber=NGC 1976
CatalogNumber=LBN 974
CommonName=Orion NebulaEndObject=SkyObject
SkyObject=BeginObjectObjectID=2,0,971
CatalogNumber=Alpha CrB
CatalogNumber=5 CrB
CatalogNumber=HR 5793
CatalogNumber=HD 139006
CommonName=AlpheccaEndObject=SkyObject
SkyObject=BeginObjectObjectID=1,0,5
CatalogNumber=
CommonName=Jupiter
DateObserved=2455758.204807
Comment=Great red spot was great! And red!EndObject=SkyObject
SkyObject=BeginObjectObjectID=1,0,4667
CommonName=Garradd
CommonName=C/2009 P1EndObject=SkyObject
SkyObject=BeginObjectObjectID=1,0,14877
CommonName=1998 DD24
CatalogNumber=42608
EndObject=SkyObjectSome comments:
- Lines may be separated by a single linefeed (LF) character ('\n', ASCII hex code 0x0A, decimal value 10), or by carriage return (CR) characters ('\r', ASCII code 0x0D, decimal 13), or by CR-LF pairs. In other words, your text file may be a unix-style text file, or a classic Mac or DOS/Windows text file.
- The first line must be StarSeekObservingListVersion=3.0
- Observing list entries are groups of keyword=value pairs. Groups are demarcated by BeginObject and EndObject lines.
- In the sample above, we've indented the keyword/value pairs within each object for clarity, but you don't have to. StarSeek strips out leading whitespace when importing the file.
- The ObjectID field is what StarSeek uses internally to identify the object. Since you don't know this, you can use the following:
1,-1,-1 for solar system objects
2,-1,-1 for stars
4,-1,-1 for deep sky objectsStarSeek will try to find the object based on the CatalogNumber or CommonName values, and fix up the ObjectID values internally after it imports the list.
- The CatalogNumber values are used preferentially instead of the name(s). Please use the same catalog abbreviations that StarSeek uses, e.g. Alpha CMa, HR 7001, M 97, NGC 1695. If the object has no CatalogNumber (like Jupiter), then enter its name(s) in the CommonName field. For asteroids, the asteroid number is the CatalogNumber; use the CommonName field for all other solar system object identifiers.
- An object must contain all of the CatalogNumbers and CommonNames you've specified to import properly. This is how StarSeek resolves ambiguities between different objects with the same name: for example, comet Garradd (C/2009 P1) vs. comet Garradd (C/2008 J5), or the asteroid Europa (number 52) vs. Europa (Jupiter's moon, no number). In most cases, though, only a single CatalogNumber or CommonName should be required to uniquely identify the object.
- DateObserved and Comment are optional. DateObserved is the Julian date on which your observation took place; Comment is the notes you want associated with the object. New lines in the notes should be indicated with a \n sequence.
- How do I get my own horizon panorama into StarSeek?
See the Help file included with the program, under the Settings > Horizon & Sky section. Briefly: first use a program like Photoshop to create a panorama from individual pictures. Your finished horizon panorama must be a 2048 x 1024 pixel image in PNG format, with alpha (transparency) indicating clear sky vs. opaque ground. North is at the left edge; south is in the middle. Connect your iPhone/iPad/iPod touch device to a computer with a USB cable, then use iTunes file sharing to copy your panorama PNG file onto your device. - The horizon is not visible! But I've got "show horizon and sky" checked, and/or a panorama selected, in my Horizon & Sky Settings. What's wrong?
Make sure your coordinate system is set to Horizon coordinates. Look in your Coordinates settings. If set to Equatorial, Ecliptic, or Galactic coordinates, the horizon will not be shown. This is deliberate - these other coordinate systems do not align to your local horizon, so it would appear skewed at a weird angle. A printed star chart uses equatorial coordinates, and does not show the horizon either. StarSeek is no different. - The sky chart is covered with hundreds of labels for satellites/comets/asteroids, and I can't get rid of them! Is that a bug?
No, you have just turned on highlighting for an object list. Look for a small green list icon at the bottom of the sky chart, and tap it. That will bring you to the object list that is highlighted. Switch off the highlighting, and the labels will go away.This feature is intended to let you quickly see where all objects in a particular list — for example, Messier objects, or an observing list that you've created — are located in the sky. You might have highlighted that list by accident. The green list icon always brings you back to the list that is highlighted.
- Can StarSeek compute the exact angular separation between two objects in the sky?
Yes! To do this, select the first object by tapping on it or searching for it. Then select the second object (also by tapping or searching). Finally, tap the Info button on the main toolbar. The Object Info data table shows the angular separation from the 1st object to the 2nd object, and the position angle. It also shows the 2nd object's angular separation and position angle from the Sun, and from the chart center. - I've turned on Night Vision, but part of your user interface is still showing in white. Can you fix that?
Probably not. Making every iPhone user interface element red is actually very challenging; there are some things that iOS does not give us any control over. For this reason, we always recommend using a sheet of red cellophane, like Rubylith, if you absolutely need every part of the screen to be red. And a "hardware solution" like this will work even if our app is in the background.
For more information, see the StarSeek 5 features page and the compatibility list on the Orion StarSeek Wireless Telescope Controller page.
We Also Suggest:


Why Buy From Orion
- 30 Day Money Back Guarantee
- Safe & Secure Shopping
- Next Day Shipping
- Easy Returns
- Sale Price Guarantee
- Free Technical Support

- Get In Touch
- How to Contact Us
- 800-447-1001
- Binoculars.com
- © 2002- Orion Telescopes & Binoculars All rights reserved
- DMCA/Copyright
- Terms and Conditions
- Privacy & Security
![]()


About Binoculars.com
Binoculars.com is a division of Orion Telescopes & Binoculars. We offer binoculars for every viewing interest, including astronomical binoculars, compact binoculars, waterproof binoculars, birding binoculars, and sport and hunting binoculars. We offer several leading brands of binoculars, including Barska, Bushnell, Celestron, Leica, Meade, Nikon, Orion, Pentax, and Steiner.. Not sure how to choose a binocular? Orion's Binoculars Buying Guide is a great place to start.
About Orion Telescopes & Binoculars
Since 1975 Orion Telescopes & Binoculars has been offering outdoor optics for sale direct to customers. Now an employee-owned company, we pride ourselves on an unswerving commitment to best quality products, value and unmatched customer care. Our 100% satisfaction guarantee says it all. In addition to our quality binoculars, we are known for our telescopes, accessories, and astrophotography equipment. Because we sell direct, we can offer you tremendous value at a great price.
sales and new products.